250mm FPV Y6 Multicopter

For MF:NY 2013 I built a folding a Folding Drone that would fit into a suitcase, and for this year’s MF:NY I’d intended to build a small, easily transportable, FPV capable multicopter. Unfortunately I had some setbacks so it wasn’t ready in time. That wasn’t necessarily a bad thing though, the site was a no-fly zone for drones due to recent laws.
I wanted something a bit different than a normal 250mm FPV frame, preferably with 6 rotors. I really like the design of BlackOut’s Mini Spider Hex and originally intended to base my frame off of his. To make sure I got peak performance I wanted to make sure everything would operate at it’s full potential. After a little research I found this thread showing that SunnySky X2204 2300kv motors I was planning to use put our more thrust and used less overall power with a 6″ prop, so with that in mind I started laying out the design in CAD.

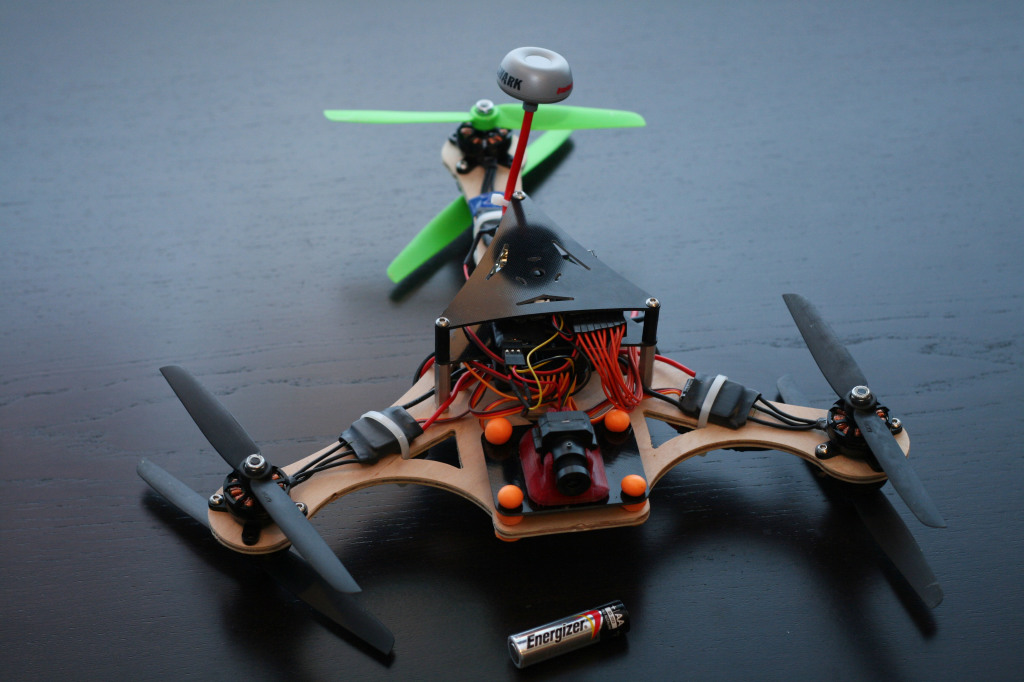
While designing this thing, I realized it was going to be big! As you can see from the photo, there’s not a lot of room in between those rotors in an effort to keep it as small as possible. With 6″ props, the frame ended up being around 350mm wide, which is large by the time you factor in the prop span. Also, I couldn’t get past the idea of making a one piece frame so I didn’t have the extra weight from the hardware, and this wasn’t possible on my CNC with a 300mm x 300mm work area. I wanted to add lightness, not hardware.
The more I thought about it, the more frustrated I became with the traditional hex layout. I really wanted 6 rotors because *supposedly* you can fly with 5 running, plus more motors equals more power, right? Then I thought, “why not a Y6?” You don’t hear much about this configuration but basically it’s a tricopter with 2 motors mounted co-axially on each point of a triangle. The counter-rotating props do reduce the efficiency sightly due to prop-wash, but it’s a proven design and eliminates the need for servo steering like a traditional tri. Aerial photographers like the tri layout because you can mount a camera and not see the props, which in theory, should make it perfect for FPV, right? So I drew it up in CAD and cut a prototype.
The frame is dead simple and fits in the 12″ x 12″ cutting area of my ShapeOko 2 CNC machine. I grabbed some 1/4 Birch plywood from Home Depot (it turned out to be 3/16) and started cutting. The resulting frame cuts in about 10min, weighs next to nothing, is 250mm from motor to motor, and allows just enough room for all the things.
Design files on GitHub (link)
Bill of Materials:
- 1 x 12″ x 12″ x 3/16″ Birch plywood (likely to convert to CF sandwich panel in future.)
- 1 x 1/16″ G10 fiberglass sheet (for top plates and camera mount.)
- 1 x Naze 32 Flight Controller (link)
- 6 x SunnySky X2204 2300kv Motors (link)
- 6 x B-12A Ice Blue ESC (link) (switched to these after having 3 “House” 16A ESCs blow up)
- 6 x HQ Prop 6×3 carbon composite prop (4 black, 2 green)
- 1 x 3300Mah 3S 35-70C Turnigy Nanotech LiPo Battery – (link)
- 1 x Mini Power Distribution Board (35mm x 35mm) – (link)
- 15 x M3 Locknuts
- 4 x M3 Nuts
- 12 x 15mm M3 Screws (cut down from 20mm)
- 4 x 30mm M3 Screws (holds distrubution board and FC.)
- 3 x 25mm M3 Aluminum Standoffs
- 3 x 18mm M3 Nylon Standoffs.
- 6 x M5 Locknuts
- 4 x 3mm id Rubber Grommets (dampening for Naze32)
- 4 x Foam earplugs (vibration dampening for camera mount)
- 1 x Mobius camera (FPV added later)
- 1 x Velcro LiPo strap
- 18 guage silicone wire
- 1 x XT60 Connector
- 1 x 3D printed Naze32 Case – (http://www.thingiverse.com/thing:500813)
- 1 x 3D printed landing gear (not happy with this, will redesign this in the future.)
The results are stunning.. the light weight plus the 6 powerful SunnySky motors make this a rocket that sounds like it’s powered by a swarm of angry bees. Here’s a brief power test:
The frame does need beefed up a bit, but flies unbelievably well with the Naze32 (I really can’t say enough about that little flight controller – I’ve had nothing but great luck with it.) The ESC wires are all run on the outside of the frame (holes are only used for the ESC servo leads) so if you crash it and destroy the frame you can have the electronics in a new frame and back in the air in about 20 min – no soldering required. In fact, you can cut a new frame on the CNC and have the entire thing back in the air in under 1 hour (because I’ve done it..)
Recently I’ve added FPV and the biggest limitation to how fast / well the drone flies is me. I need much practice (will post an updated about the FPV setup – video below) but I think this is the making of a very capable racer.